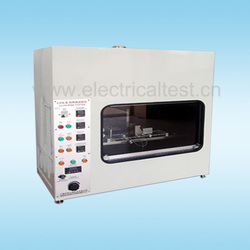
Glow wire tester is designed and manufactured according to glow-wire test method in IEC60695, GB5169.10-11 and GB4706.1 standards requirement, which is applicable for carrying out fire hazard testing for electrical and electronic products, household appliances and materials, simulating thermal stress caused by burning components or overload resistance heat or ignition sources in a short time. The glow wire tester uses steel spraying, imported instrument display, easy operation, stable performance, suitable for quality inspection departments at all levels and relevant enterprises to process flame test.
The main technical parameters and functions:
1. Power supply: AC220V, 50Hz, ≤ 500W
2. Heating temperature: 500℃ ≤ continuously adjustable within the range, temperature measurement accuracy ± 5℃
3. Glow wire tester burning time: 0.1-999 .9 s, ± 0.1S (time adjustable)
4. Ignition time :0.1-999 .9 s, automatic recording, manual pause
5. Flame extinguishing time: 0.1-999.9 s, automatic recording, manual pause
6. Glow-wire pressure on the specimen: 1 ± 0.2N, pressure limiting depth of 7mm
7. Glow Wire: φ4 Nickel (80%) chromium (20%), made according to the required size.
8. Thermocouple: φ0.5 armored nickel-chromium / nickel aluminum wire, K indexing
9. Auto off: After reaching a predetermined burning time, the sample automatically breaks away from the glow wire
10.Dimensions: Width 1160mm ×depth 600mm × height 1295mm
Glow Wire Tester Test Operation Procedure:
1. Specimen clamping: clamping specimen referring to standard, adjust the height of the specimen mounted on the fixture.
2. Fire control: Place the cylinders key on "set" position, rotating black ignition switch to the "ON" position, turn on the meter valve, press the "gas on" button to turn on the gas supply, ignite with a lighter, place flame height indicator on top of the burner tower, adjust the meter valve, so as to meet the flame height (12mm ± 1) required by the standard.
3. The machine is attached with a set of flame intensity calibration device, the method to used is: first place thermocouple wire hanging temperature testing copper block just above the needle, press the "gas on" button, then hold down the ignition button to ignite, (adjusting the meter to about 0.03 scale is relatively easy to start); press the temperature measurement button, while observing the thermometer and timer, when the temperature rises to 100 ℃, the timer automatically times, and the timer automatically stops when temperature rises to 700 ℃, observe whether time on the timer is 23.5S ± 1.0S. (Standard: 23.5S ± 1.0S)
4. Angle adjustment: the angles adjustment is as follows: Loosen knurled bolt in front of the combustion seat, pull bolts and rotate to the required angle by hands, and then tighten the bolts.
5. Flame operation: Press the "Reset" button to clear the counter, press the "gas on" button, then hold down the "ignition" button, lit the needle flame, and finally press the "right line" button. When running to flame making points, the flammability tester will automatically start to time, when it reaches the set flame time, the flame goes off and burner seat automatically moves back; while "continuous burning time" starts counting, the operator should press the "pause" key immediately when the sample flame is extinguished, this time displayed is after flame time. If you want to shutdown midway, please press "stop" button.
6. End of the trial: After the test is finished, open the fan to exhaust gases and smoke, turn off the meter, rotate the black ignition switch to "OFF" position, pull the cylinder key to the "off" position, and clean the combustion chamber.
 RSS Feed